Uponor UK
Head Office
Uponor UK
The Pavillion
Blackmoor Lane
Watford Hertfordshiree
WD18 8GA
Uponor

The step-by-step guide to Minitec installation; a low-profile system

21 June 2021

The step-by-step guide to Minitec installation; a low-profile system


Underfoot Underfloor heating (UFH) is quickly going from aspirational luxury to a standard must-have, with figures indicating that the market is growing 10% per year. This popularity is being driven by a number of factors, such as an increased awareness around energy efficiency and how UFH provides economic, thermal comfort and space saving benefits.
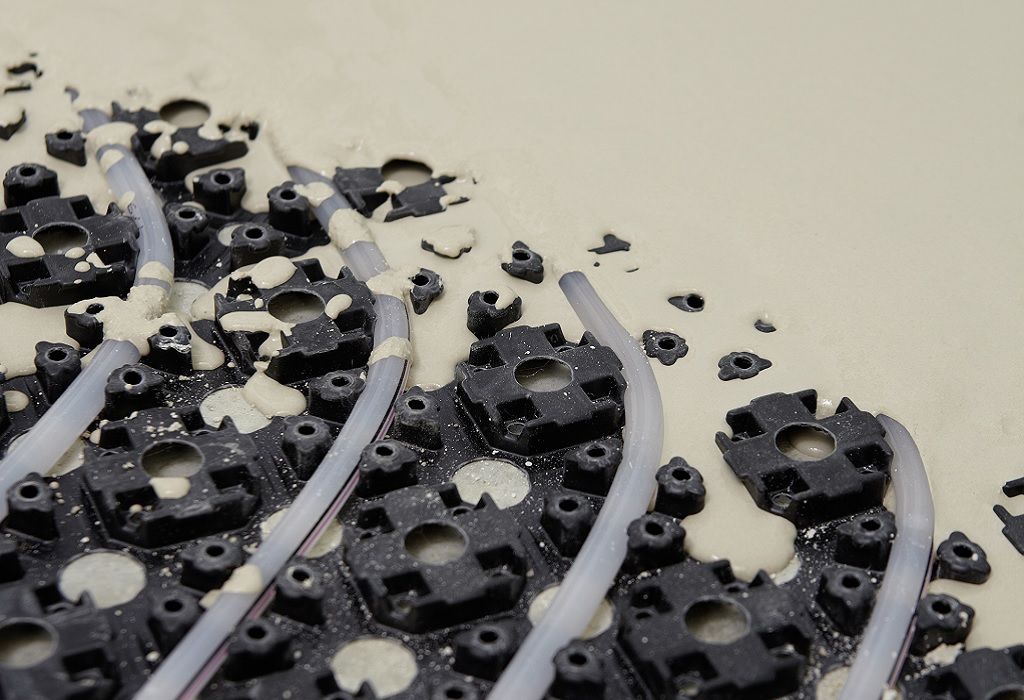
For a long time, this type of heating was the preserve of new builds, with retrofitting seen as too time consuming, expensive and difficult. However, better knowledge and improved technology has led to low-profile systems that are ideal for retrofit projects thanks to the specialist heights and designs that they come in. This type of system can be laid onto solid concrete, timber suspended floors or tiles and allow for numerous floor coverings to be installed on top.

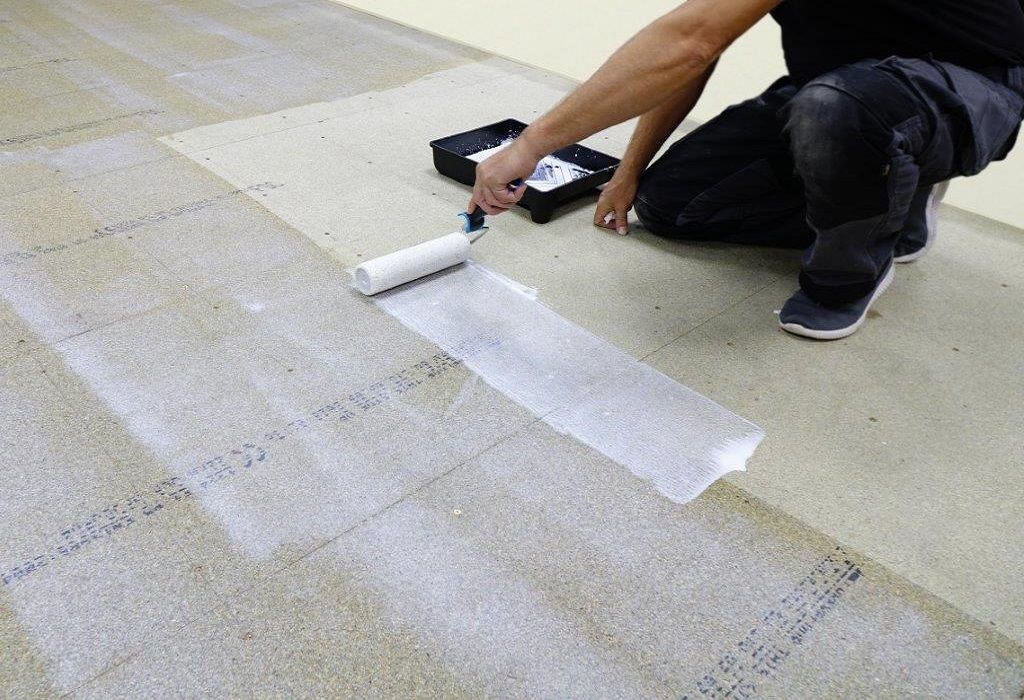
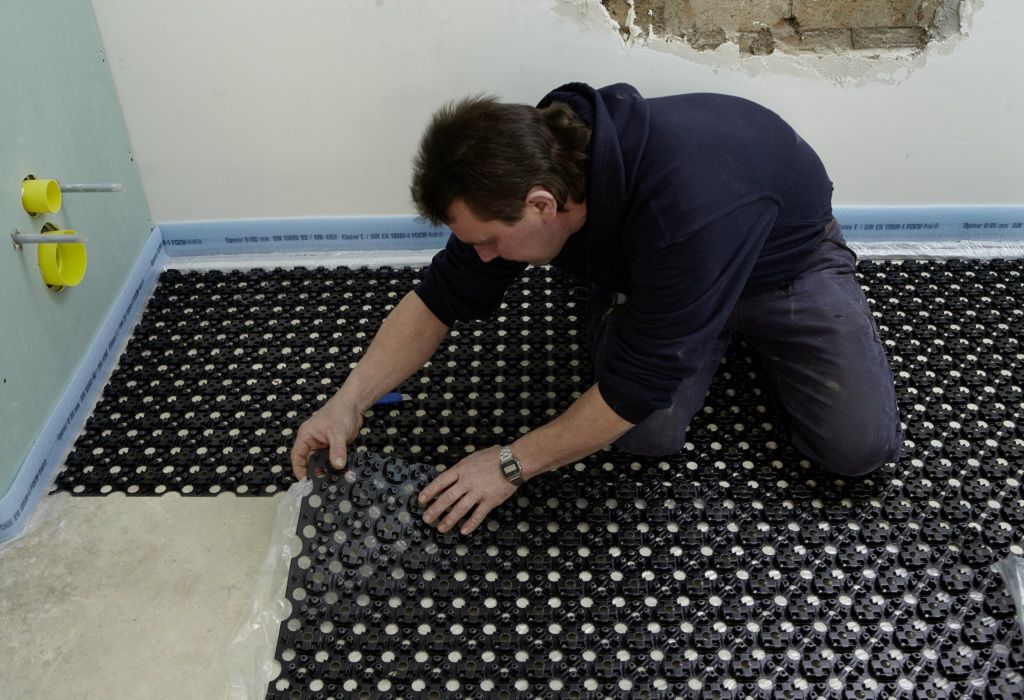
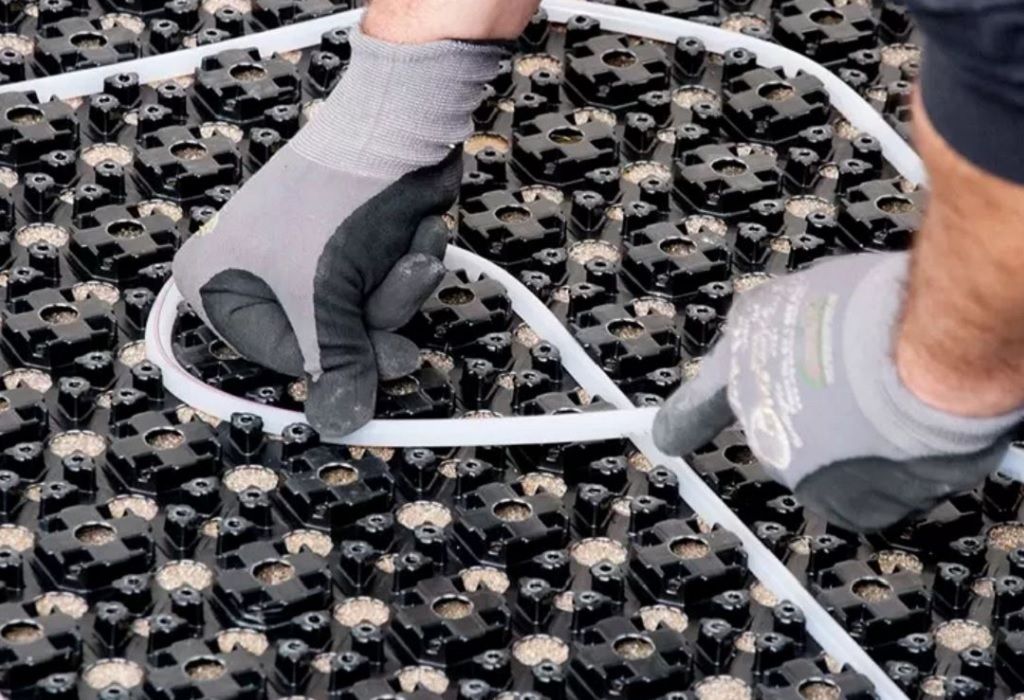
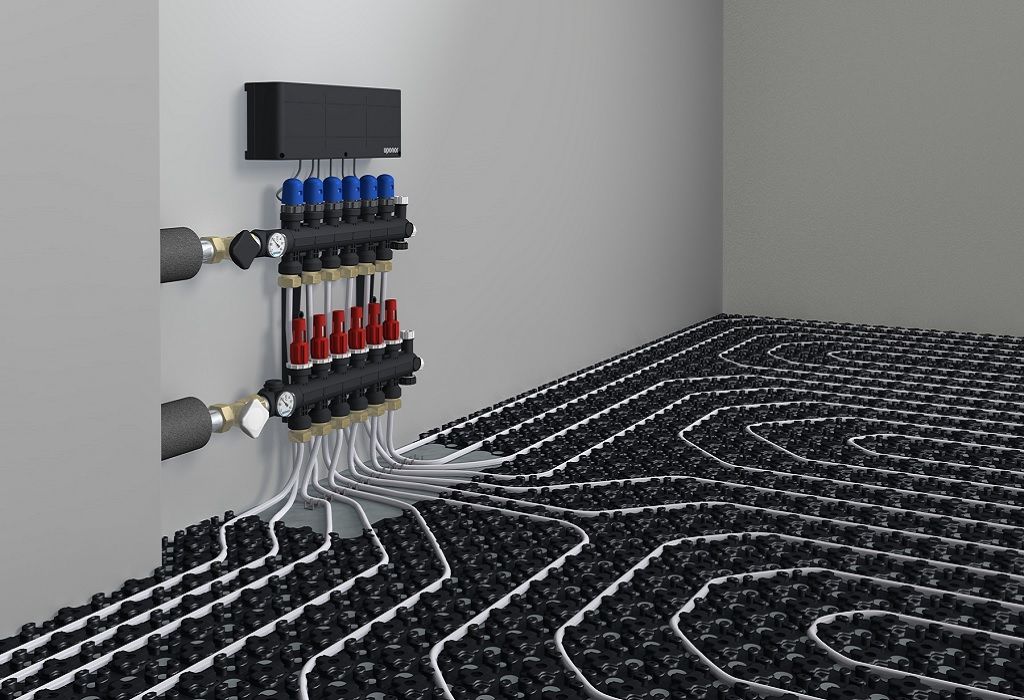
There are several key differences between installing a regular UFH system and a low-profile one. To help illustrate how to install a low-profile system, we’ve compiled a step-by-step guide to applying the ultra-thin, wet-screed based system Minitec.
minitec

Step 1

Remove the old carpet and adhesive and then clean and prime the concrete screed so that it’s ready for the UFH panels to be applied. The panels can also be installed directly onto tiles, but they must also be properly cleaned and primed. For wet-screed systems like Minitec, the primer needs to be compatible with the levelling compound, which is going to be applied at a later stage.

It’s important that the subfloor is stable, flat and properly prepared, as otherwise it can lead to problems later on such as damage to the floor finish. If the UFH panels are going to be laid on old floor boards then it’s important to lay at least 5mm of self-levelling screed first.
minitec

Step 2

Next, fix the edge strip to the wall and lay the UFH panels across the floor area. Both the edging strip and the panels of the Minitec system have a self-adhesive layer on the back to aid application and make sure that the system stays in place.

Remove the protective backing on the edging strip and press along the wall, beginning from the right-hand corner of the room. The edging strip is provided in different profiles in order to help create an effective seal along the walls and floor. Then, remove the backing from the panels to expose the adhesive layer. Attach the panel first at one corner and roll it out across the floor, applying pressure to secure the panel in place.

Minitec panels can be walked on without boarding over and when the whole area has been covered the panels can be easily cut to shape with a knife.
minitec

Step 3

Once the panels are down, connect the polyethylene pipes according to the floor plan, ensuring the pipes are laid in loops of equal size. The Minitec panel allows the 9.9mm pipes to be clipped in at a minimum of 50mm centres. This is the distance between two pipes measured from the ‘centre’ of one to the next. 50mm is much closer than the typical 100mm centres and means that the UFH is more reactive, able to heat up 50-60% faster than standard UFH systems. If there are any obstacles in the room, you need to vary the centres on the pipes to avoid the obstructions.

The tracking in the panels combined with the flexibility of the pipes helps you to lay Minitec’s pipes in consistent, accurately spaced lines. Minitec panels are designed to allow the pipes to be installed in both 90˚ and 45˚ bends. Simply apply firm pressure to fit the pipes into the panels’ grooves, using your foot to press them into place. The robust nature of the system means that you don’t have to worry about breaking the panels during this step.
minitec

Step 4

Once this has been done, the manifold can be installed, the pipes connected and the system tested. If connecting to the Uponor compact manifold with branch compression connections, the pipe needs to be bent at a right-angle and pushed onto the compression adaptor. The end of the pipe, including the adaptor is compressed onto the pipes and screwed onto the manifold.

minitec

Step 5

Once the pipes are in place, a levelling compound should be mixed and poured on top, covering the pipes and panels. With Minitec, there are prefabricated holes at regular intervals which ensures that the levelling material flows in smoothly and is able to bond directly with the underlying substrate. This layer is applied until it reaches just above the panels’ studs, achieving the 15 mm installation height.

Compounds are available with curing times as low as 30 minutes, meaning that the floor finish can be applied the same day. Normally hard surfaces such as ceramic tile or stone will be chosen, as they’re good materials for transferring heat to the surface of the floor. However, Minitec will work with the majority of floor coverings including carpet – so long as the combined tog rating of the carpet and underlay does not exceed 2.5 tog value it won’t affect the UFH’s ability to heat the room.

The heating system itself can be brought up to temperature only three days after laying the compound. This is also the point at which you can optimise the efficiency of the Minitec system by connecting it to the Smatrix Pulse smart control.
For more information on Uponor Minitec please click here